Easily create and publish Events/Seminars.
Let’s take a look at how you can view and Add a New Event!
Navigating to Events
Navigate to Classes & Events using the side navigation menu within the Admin Dashboard.
On this page, you can view the Attendees and Edit your Events details. If you’re visiting this page for the first time you’ll likely not see any Events listed.
But let’s change that!

Adding an Event
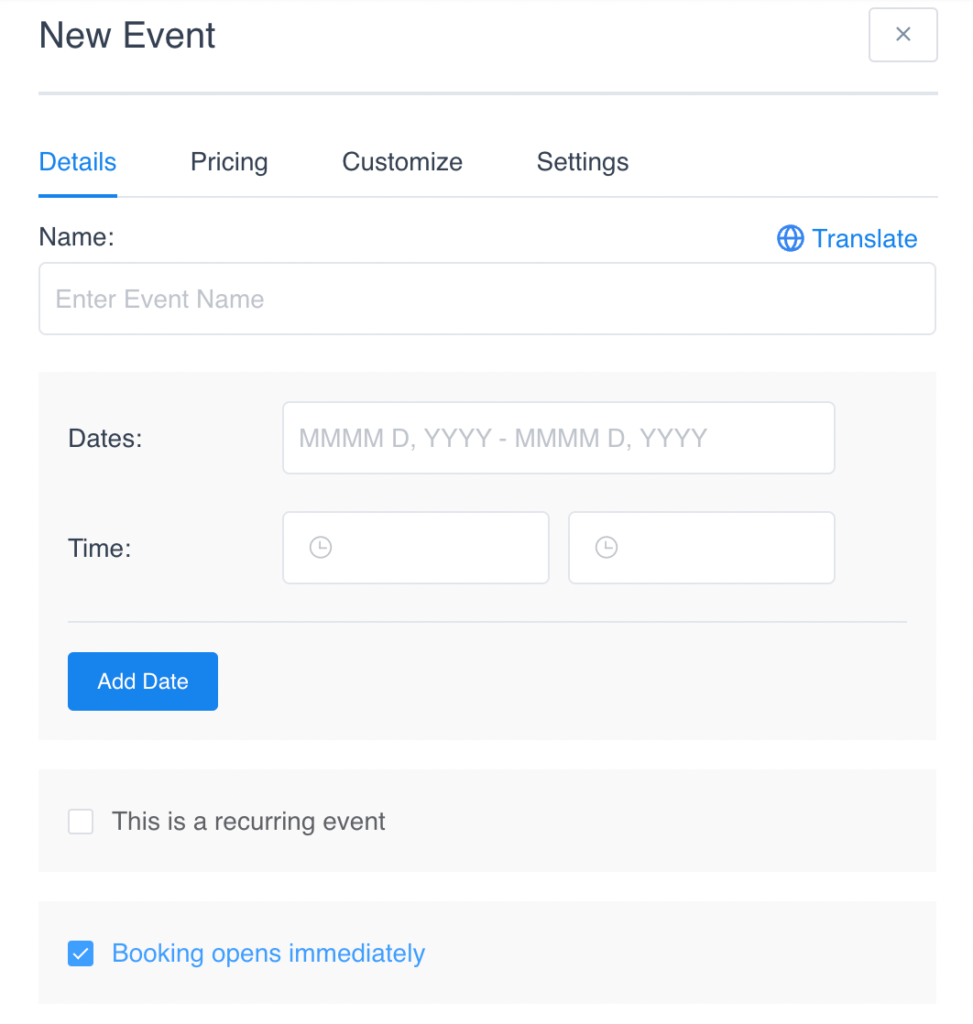
To add a new event simply click the “New Event” button. An Event form will open to the right of the screen.

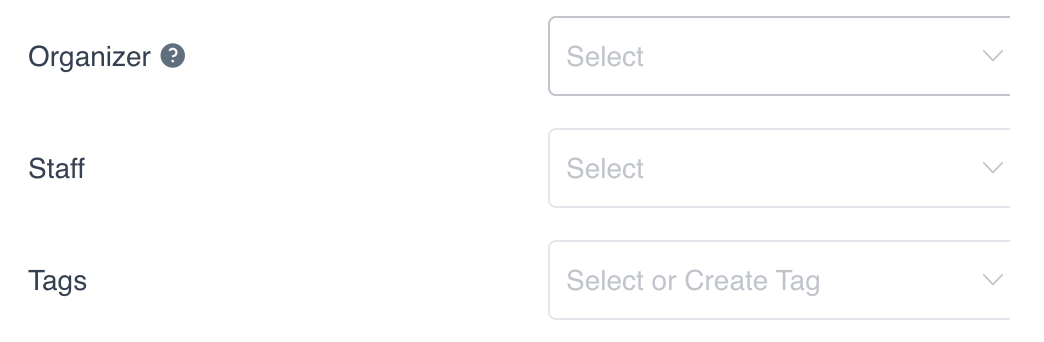
Get started by providing some Basic Details about the Event ( Name, Dates/Time, Address, Organiser, Staff and Description).
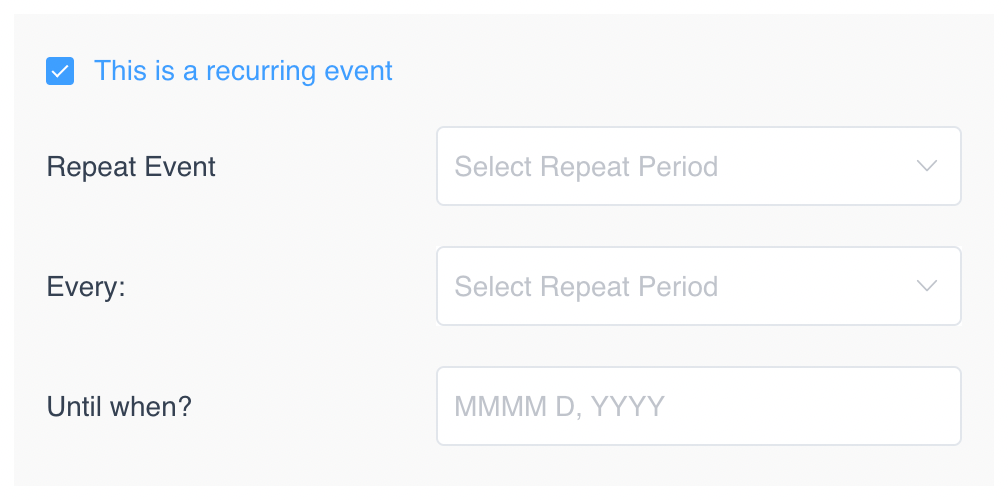
IMPORTANT NOTE: When creating a recurring Event be sure to enable the “This is a recurring event” button and set how frequent you want the Event to repeat e.g. Daily, Weekly, Monthly.
“Until when?” date is a required field. If you don’t want the Event to expire, then set the “Until When?” date to a date in the distant future. Example: 22/10/2034
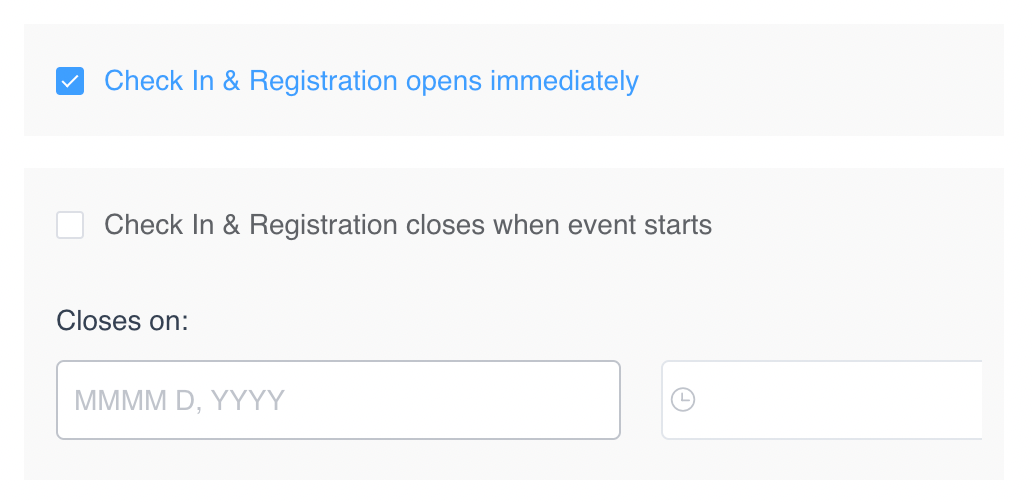
You can additionally set when you want to make Events available to users to Book/Check-In. Simply uncheck the boxes for “Check In & Registration opens immediately” and “Check In & Registration closes when the event starts“. Set the date and time to open and close the events/classes.
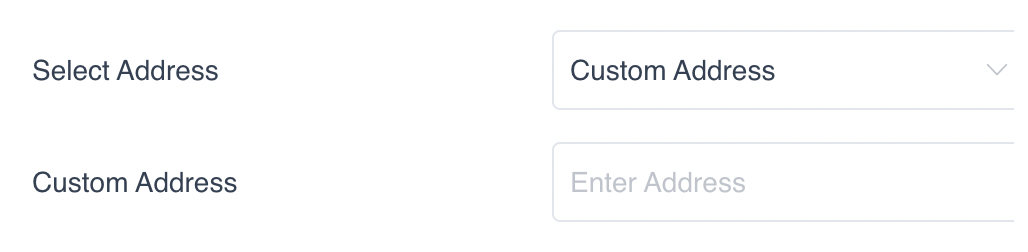
If your event is occurring at a different location you can select from your addresses or specify a custom address.
Select who is the Organizer of the Event and specify which Staff are involved. This is a required field so be sure to select at least one Organizer and one Staff member.
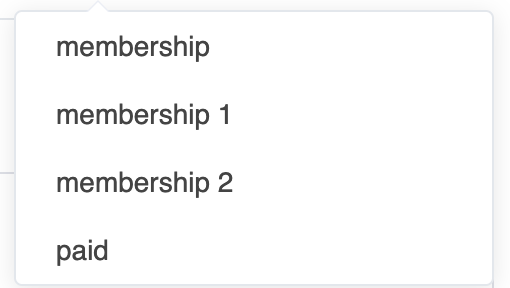
Important Note: Tags allow you to restrict access to classes and events. Use “membership” tags to limit which membership type you wish to give access to this class. This will prevent specific members from checking into the wrong classes.
For example; An adult member checking into a kid’s class.
The “paid” tag is used for any Paid or Free Events, that you want to make available to both members and non-members. The “paid” tag will display any events or classes on the member portal “Book Online” page.
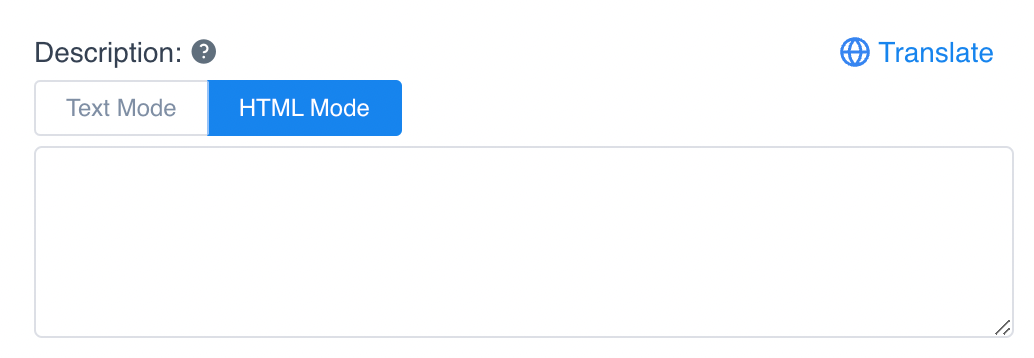
A description can be added if the Event warrants additional details.
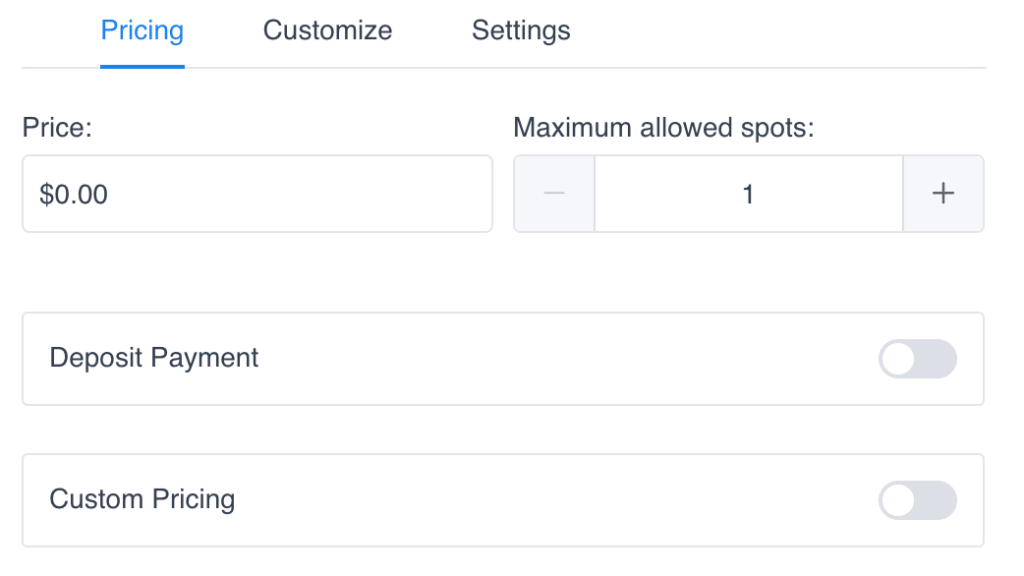
If this is a Paid Event you’ll need to include the costs under the Pricing tab. If it is a Free Event, keep the price at zero. You can additionally limit the capacity for an event by setting the Maximum allowed spots.
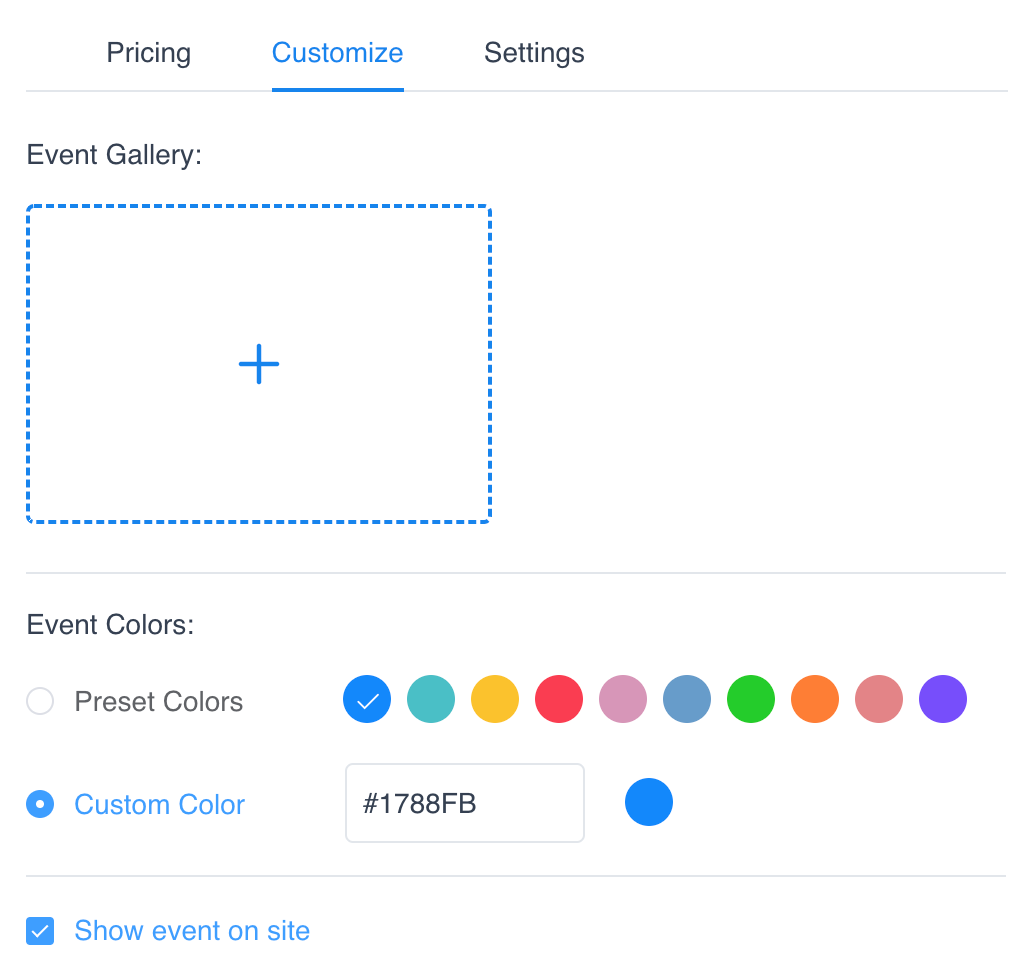
Spruce up your Event by adding an Event Image or using Custom Colours. Try to keep the colours consistent for events of similarity, this way your customers can begin to familiarise themselves with the different Events held.
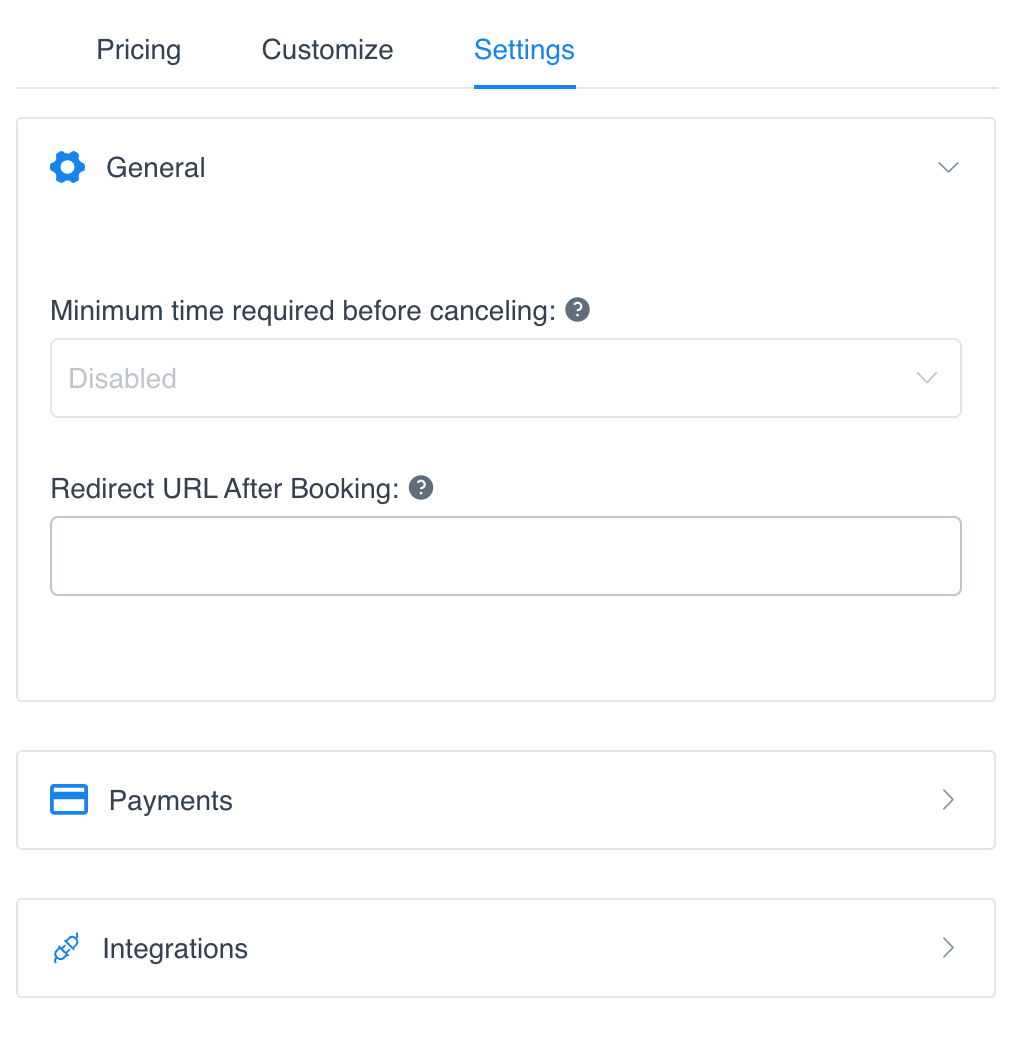
To finish up set some General settings. Set whether you wish to allow cancellations, if so add a Minimum time period before cancelling. If you want customers redirected after completing a booking you can include a Redirect URL here. Under the Payments tab, be sure to link to Appointment or Event to get paid directly to your main bank account.
Finally, don’t forget to “Save” your newly created Event.

And that’s it! We’ve successfully added our first Event.
Additional Reading:
- Add a Class
- Limit Classes Based on Membership Type – Using Tags
- How to Set Capacity on an Event or Class
- Restrict Check-In Times
- Change Payee on Class or Event
- Add Multi-Day Events
- Allow Members to Check-In Additional People
- Enable Same Member to Check-In More Than Once
- How to Cancel an Event or Class