Receive a summary of all Appointments, Employees, Services and Finances data within the Dashboard view.
Let’s take a look!
Navigating to Dashboard
Navigate to Roster > Dashboard using the side navigation menu within the Admin Dashboard.
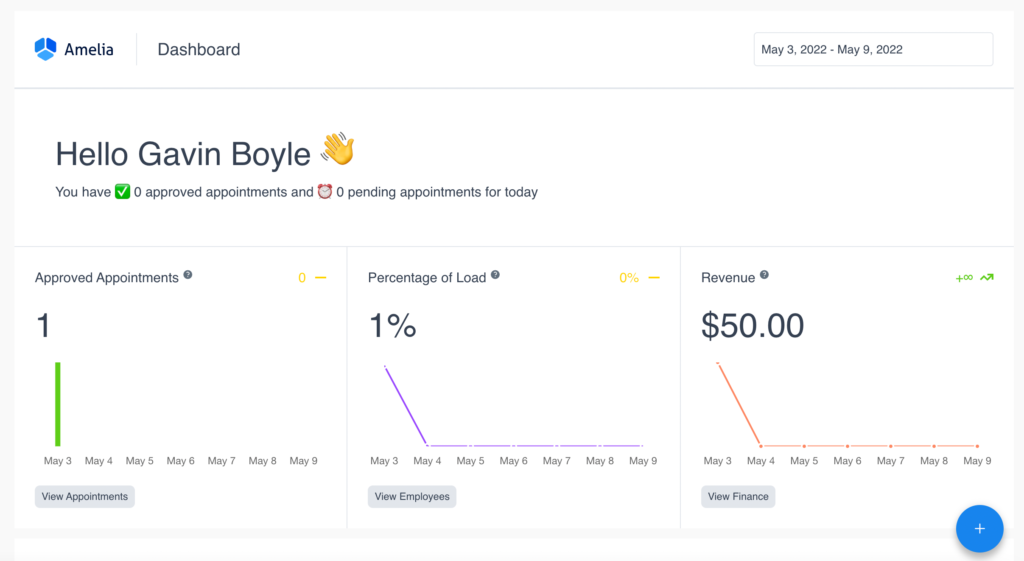
To view statistics for a particular Date Range be sure to update the Datepicker in the top right corner.
The logged-in user will see a notice beneath the “Hello [User]” message, for any Approved or Pending Appointments for the current day.
Below this, you’ll find 3 charts. The Approved Appointments metric represents all the approved appointments for the chosen date range. The Percentage of Load indicates the percentage of occupied time against available time for appointments in the chosen date range. Revenue shows the total income for paid appointments in the chosen date range.
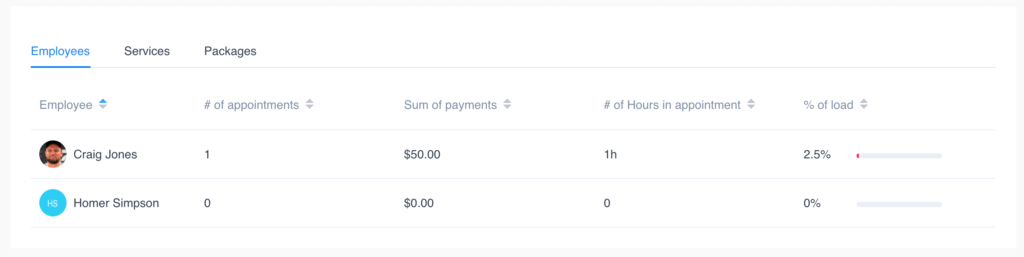
The next section displays the table which shows detailed data for each Employee or Service. The table contains the 5 columns:
- The Name of each Employee/Service
- The Number of Approved Appointments for each Employee/Service.
- The Sum of Payments for the total amount paid for appointments for both Employees/Services.
- The Number of Hours represents the total number of scheduled hours for each employee/service.
- The Percentage of Load calculates the [number of scheduled hours for approved appointments / the total number of working hours for an employee/service] to give the workload for each.
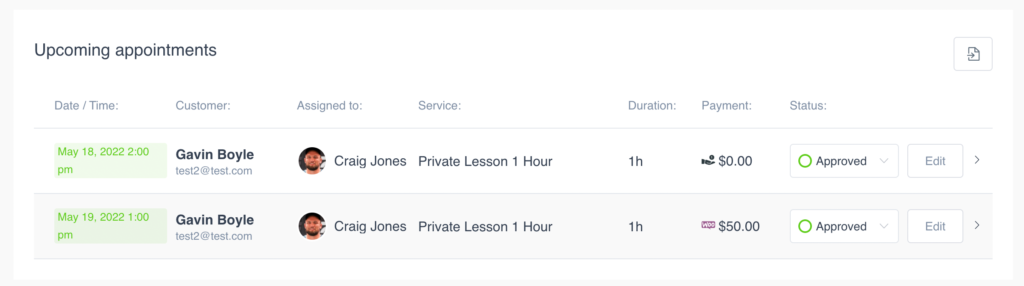
Under the next sections, you’ll find all Upcoming Appointments. Each appointment on the table shows:
- Date/Time of the appointment
- Customer Name and Email
- Employee that the appointment is Assigned To.
- Service that was purchased by the customer.
- Duration of the appointment.
- Total cost of Payment.
- Status of the appointment [Approved, Pending, Cancelled, Rejected].
- Edit button will open the appointment form to make changes to an appointment.
- Expand button will reveal additional contact details for the customer.
You can additionally Export the list of appointments by using the export button in the top-right corner of this section.
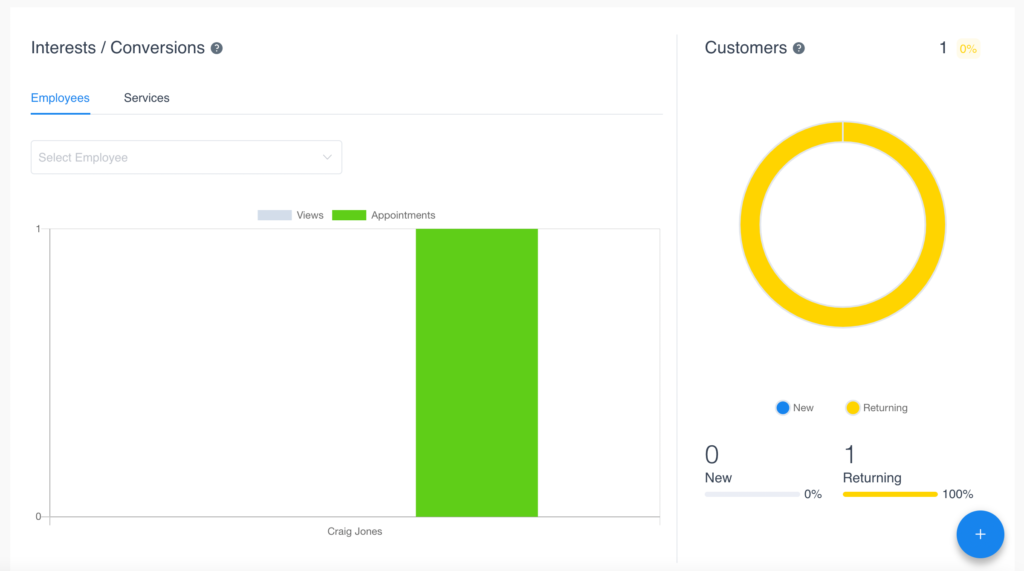
Further down the page, you’ll discover more analytics comparing customers’ interest in making a service appointment against actually arranging service appointments. Once a customer confirms a booking the View is converted into an Appointment.
The graph on the right indicates the number of New and Returning customers for the selected date range.
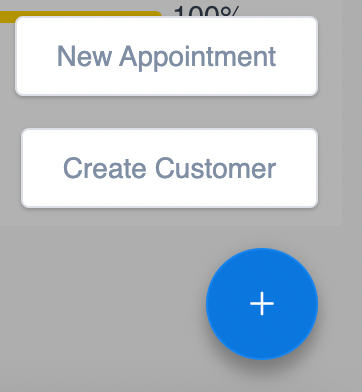
To create a New Appointment or Create a New Customer you can simply click the Blue Circle Plus (+) button to open the form.
And that’s it! Let the Dashboard help you manage your Employees and Services. Plus gain insights into your Customers.
Additional Reading: