Manage all your Customer data in one place. Easily view, edit and add new customers to your app!
Let’s take a look at how!
Navigating to Customers
Navigate to Roster > Customers using the side navigation menu within the Admin Dashboard.
On this page, you can View and Edit your Customer’s personal and appointment details. If you’re visiting this page for the first time you’ll likely not see any Customers listed.
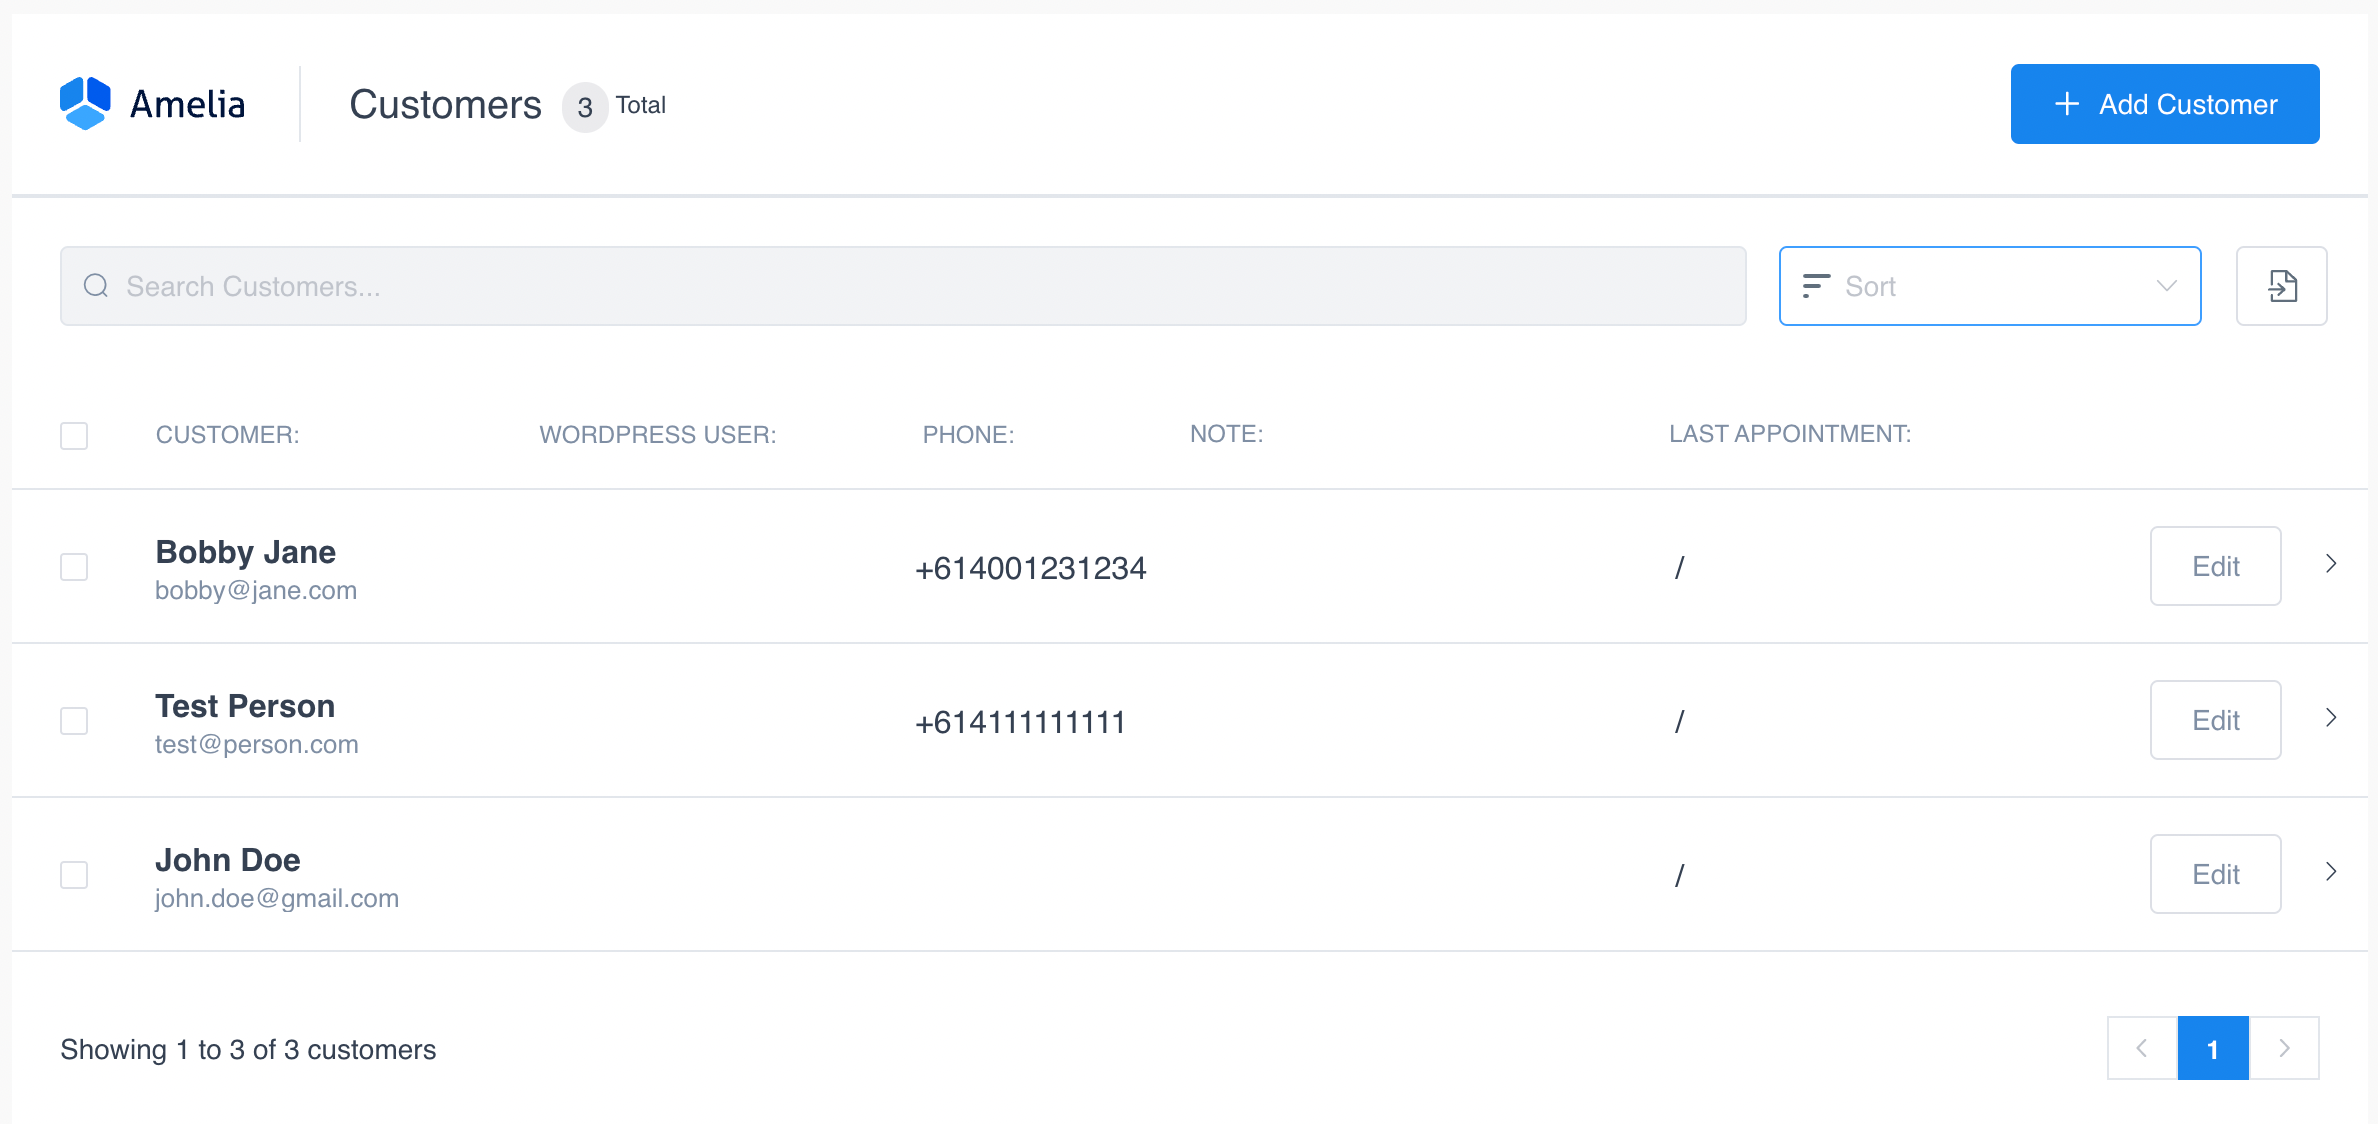
Use the Search functionality to quickly find customers, using the Sort you can change the alphabetical order of the Name in the list or by the Last Appointment. Additionally, you can Export the list of customers by clicking the File Icon.

By clicking on a customer in the table you can view additional details regarding Appointments and any logged Notes. Easily edit a customer’s details by clicking the “Edit” button.

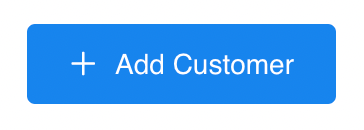
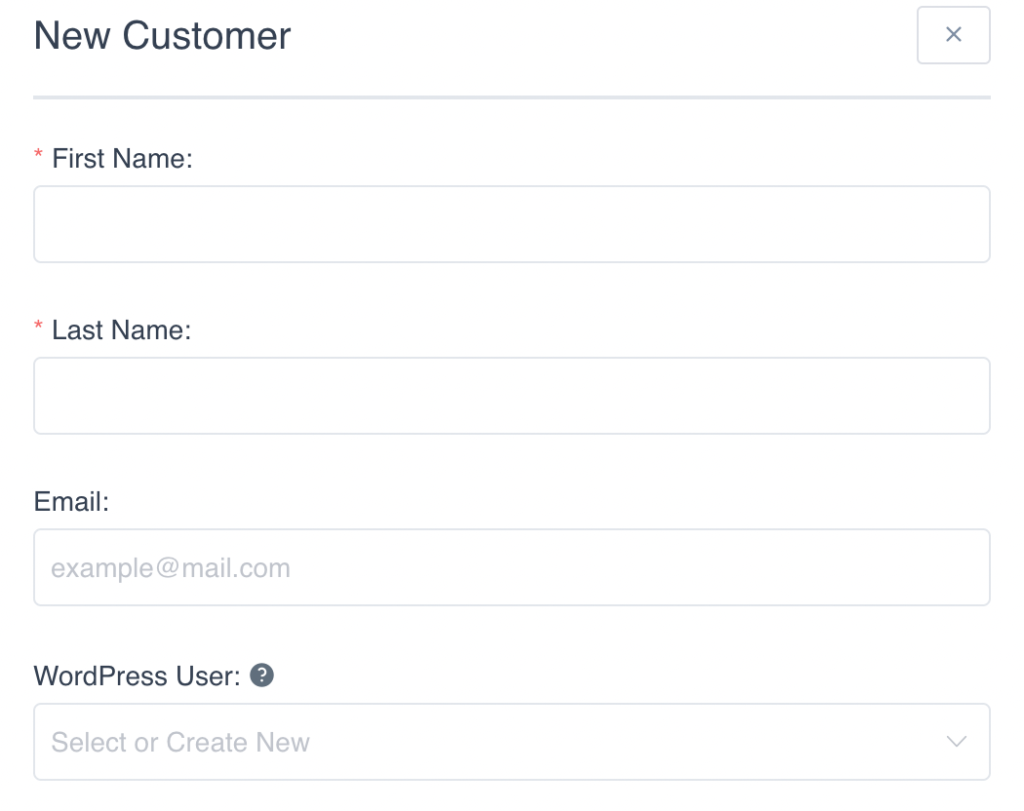
To add a new customer simply click the “Add Customer” button. The add customer form will open to the right of the screen.
Provide the necessary details for your Customer (Name, Email, Number, Date of Birth, Gender). If your customer already has an account set up you can find them under System User or Create New. If required you can add Internal Notes for a customer.
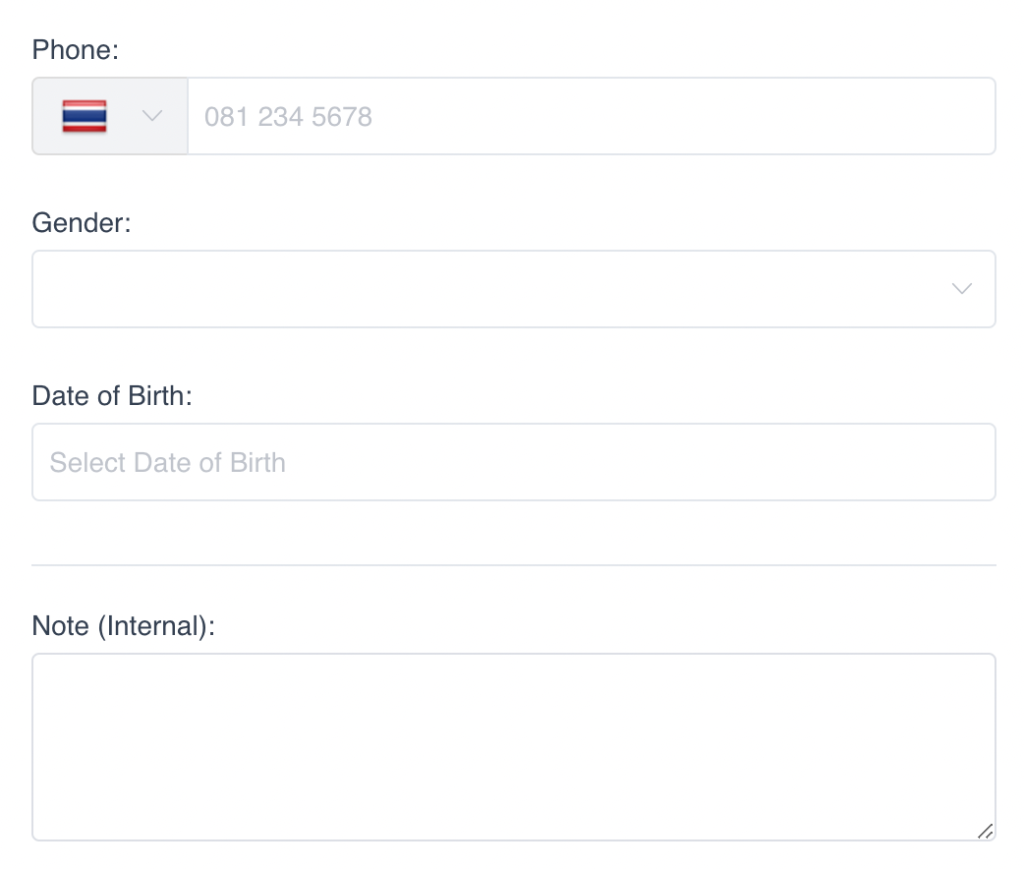
Finally, don’t forget to “Save” your newly created Customer.
And that’s it! We’ve successfully added our first Customer.
Additional Reading: