Have you assigned the CRM Agent Role to your users yet? No?
Check out the following doc before continuing with this article.
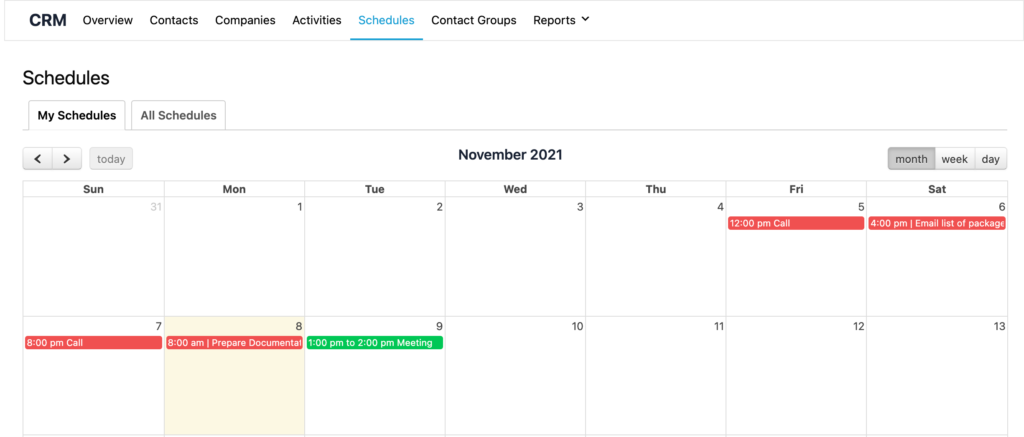
Most organizations need to schedule their day to day Meetings and Calls. With the CRM system all Scheduled Activities are reflected on a personalised Virtual Calendar that can be accessed via the Overview or Schedules tab within the CRM page.
Navigating to Schedules
Navigate to the CRM page within the Admin Dashboard, then select the Schedules tab to see the Virtual Calendar. Users can choose to view their own (My Schedules) or everyone’s (All Schedules). Users can change the view based on months, weeks or days.
To Open an activity a user can simply click the item on the calendar.
Creating a Schedule
All Schedules are linked to either a Contact or Company within the CRM System.
Navigate to the Member CRM page within the Admin Dashboard, then choose the Contact tab. Select a Contact from the table by clicking the Name or the View option and then navigate to the “Schedule” tab.
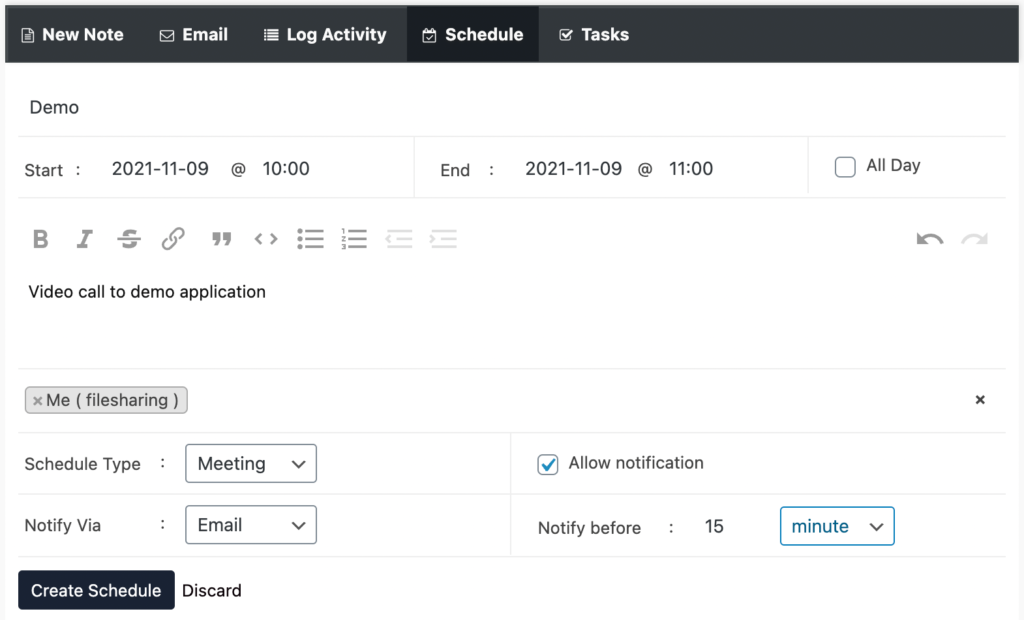
Adding a schedule activity requires the following fields: Title, Start Time, End Time, Description, Assign an Agent and Schedule Type (Call or Meeting).
Notifications can also be set to remind all parties about the scheduled activity. To save your scheduled activity click “Create Schedule“.
Once saved, you can navigate back to your Virtual Calendar to view your newly created Scheduled Activity.