There are a few settings required to enable Emails to be sent via the CRM system.
Let’s take a look at where to go to configure these settings.
Navigating to Connect Email To The CRM
Navigate to Settings using the side-navigation menu within the Admin Dashboard.
On this page, you’ll find the link to the Connect Email To The CRM.
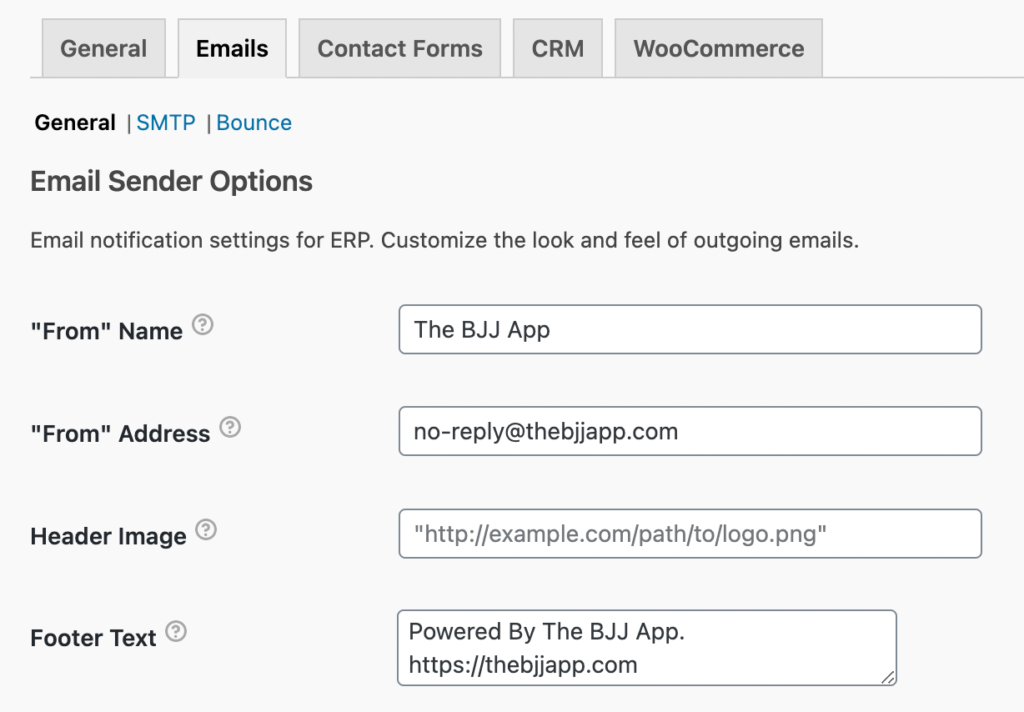
Under the Email tab, there are some General settings required for Email Notifications to be sent.
“From” Name is the name seen on outbound emails and “From”Address is the email address displayed on outbound emails.
A Header Image and Footer Text can also be included on outbound emails.
Each of the Notification Emails can be Enabled/Disabled and are fully customizable.
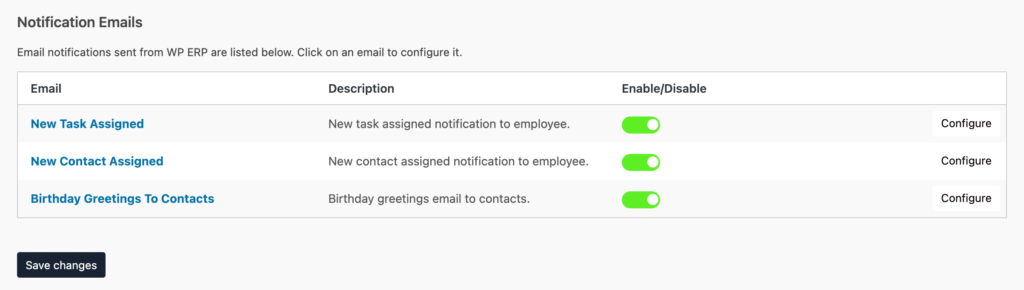
To edit an email template click “Configure” next to the Notification Email you wish to modify.
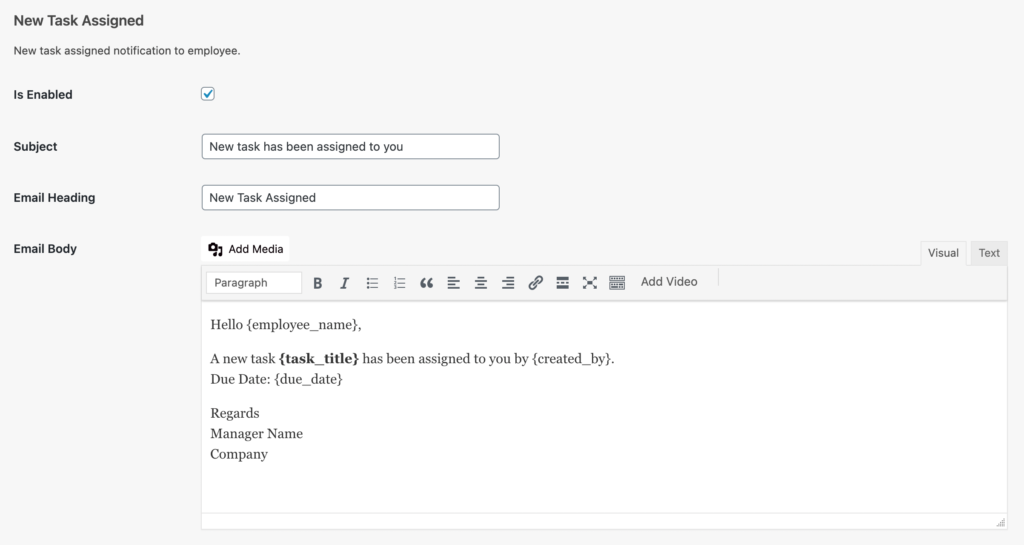
Update the Subject and Email Body of the target email template. You can use these template tags inside subject, heading, body and those will be replaced by original values: { employee_name }, { task_title }, { due_date }, { created_by }.
Don’t forget to “Save Changes“.
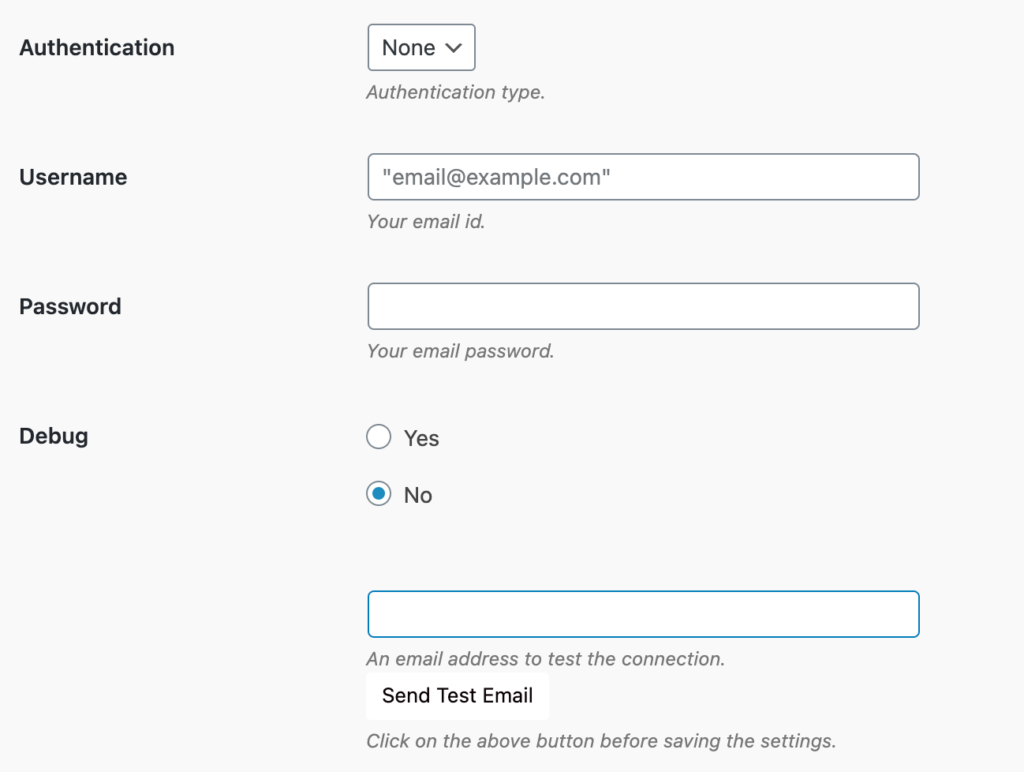
Under the SMTP section, you can input the necessary SMTP credentials if you have a mail server you wish to connect to the CRM system.
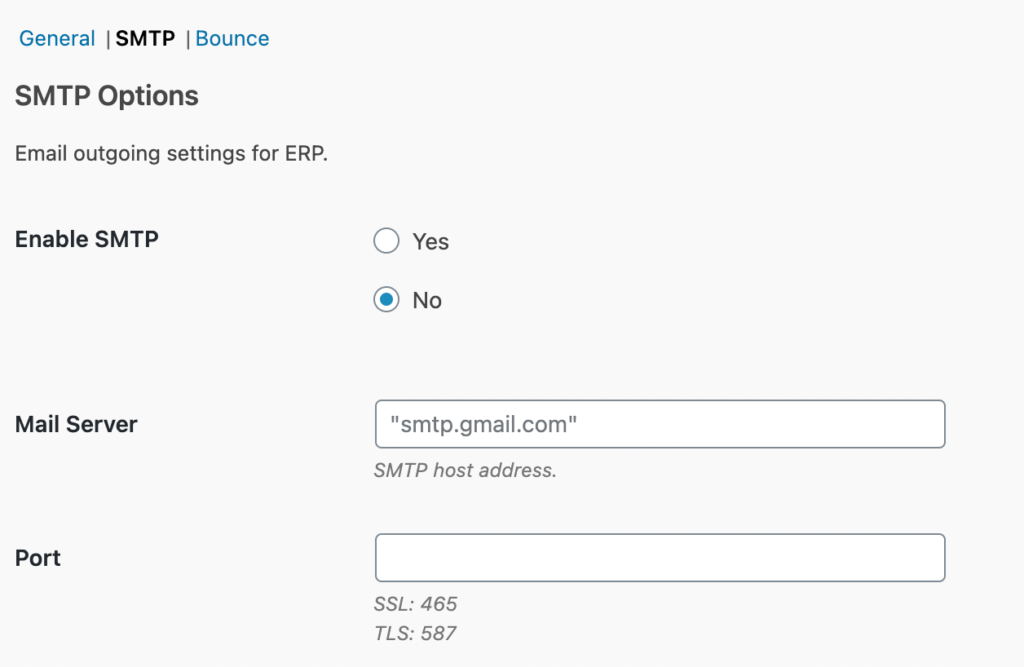
Once you’ve inputted the credential be sure to “Send Test Email” to verify the SMTP has successfully been configured.
Don’t forget to “Save Changes“.
Additional Reading: