Add Notes or Conditions of Entry to display to your customers upon Checking In.
Let’s take a look at where we can configure these settings!
Navigating to Check-In Form
Navigate to Settings using the side-navigation menu within the Admin Dashboard.
On this page, you’ll find the link to the Check-In Form.
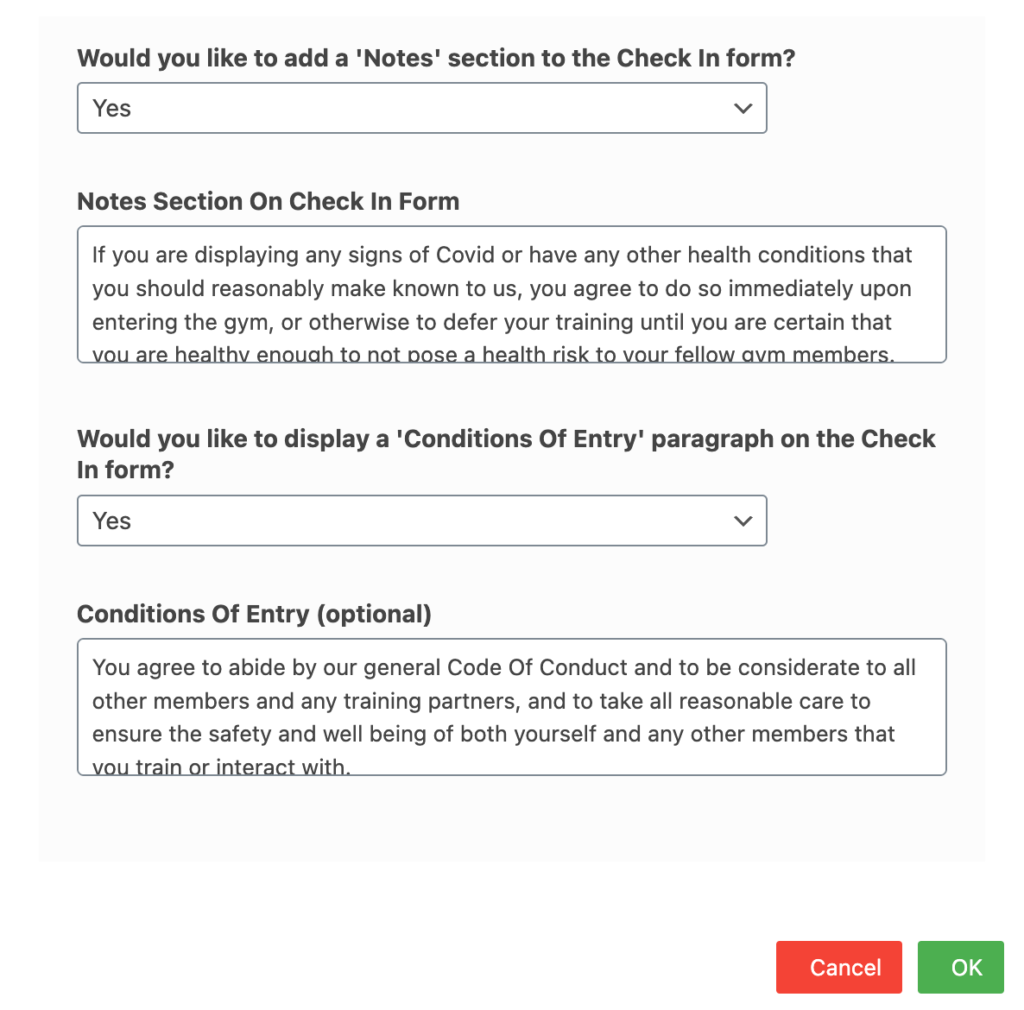
To Update these settings, click on the row on the table and then select “Edit“.
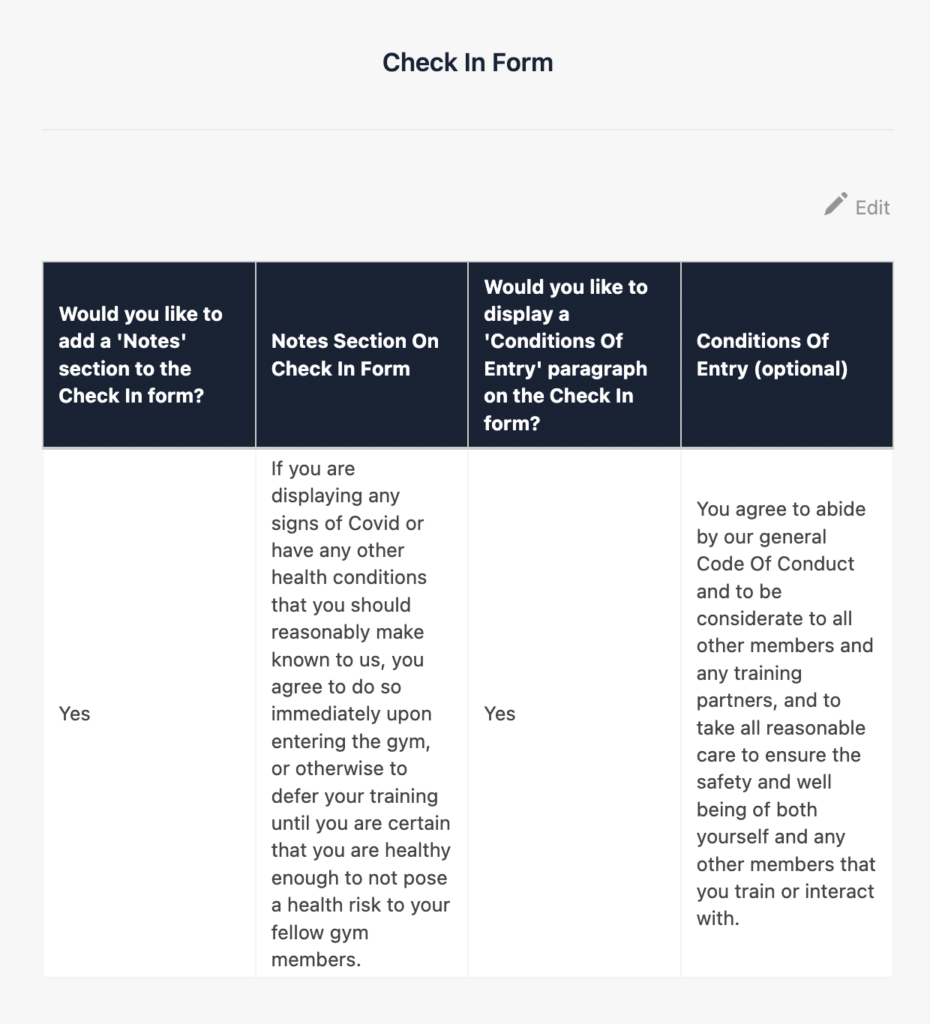
You can choose to Display or Hide these Notes and Conditions of Entry on the front-end for your customers. If you choose to display be sure to add the necessary information you want to be shown before a customer checks in.
Hit “OK” to save your changes.
When a non-members try to check in you can select from a list of different scenarios.
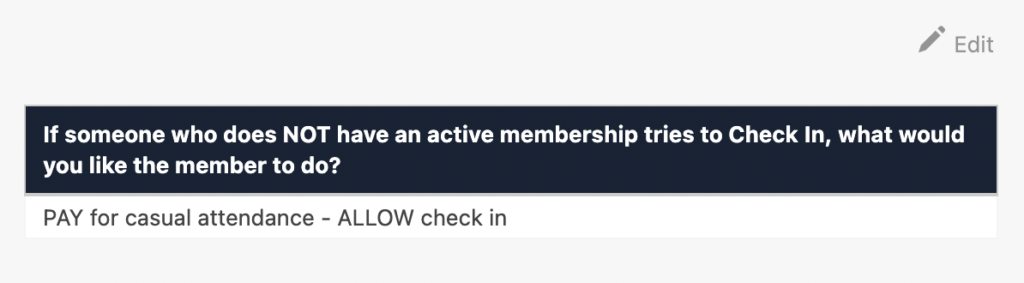
Select one of the below options:
- PAY for casual attendance – ALLOW check-in.
- SEE FRONT DESK to fix membership – ALLOW check-in.
- SEE FRONT DESK to fix membership – DO NOT ALLOW check-in.
Then hit “OK”

And that’s it! These notes will now be displayed to your customers before checking in.